
In this post, we will use simple de-noising autoencoder to compress MNIST digits to <=10 dimensions and then accurately re-construct them.
Using AutoEncoder to represent MNIST digits
First, let’s run the auto-encoder without any hidden layers and use encoding size of 10, since there are 10 digits. For now, we’ll also use default values for all other hyperparameters. This is the command:
python ~/repos/autoencoder/autoencoder_use_mnist.py --encoder_network=784,10 --batch_size=64 --num_epochs=100 --logdir=LD_784_10
it will run for 100 epochs and use minibatch size of 64. Once it is done, the test loss is 0.206152.
Is this good or bad? To better understand it, lets do some visualization.
tensorboard --logdir=LD_784_10
If we go to the “IMAGES” tab we shall see 8 images. First 4 are some unmodified input images. The last four are re-constracted images from input’s encodings.
What happens, is that each input image is compressed to only 10 numbers using encoder. Then, decoder part of the network using these 10 numbers to re-constract original image of 28x28 pixels.
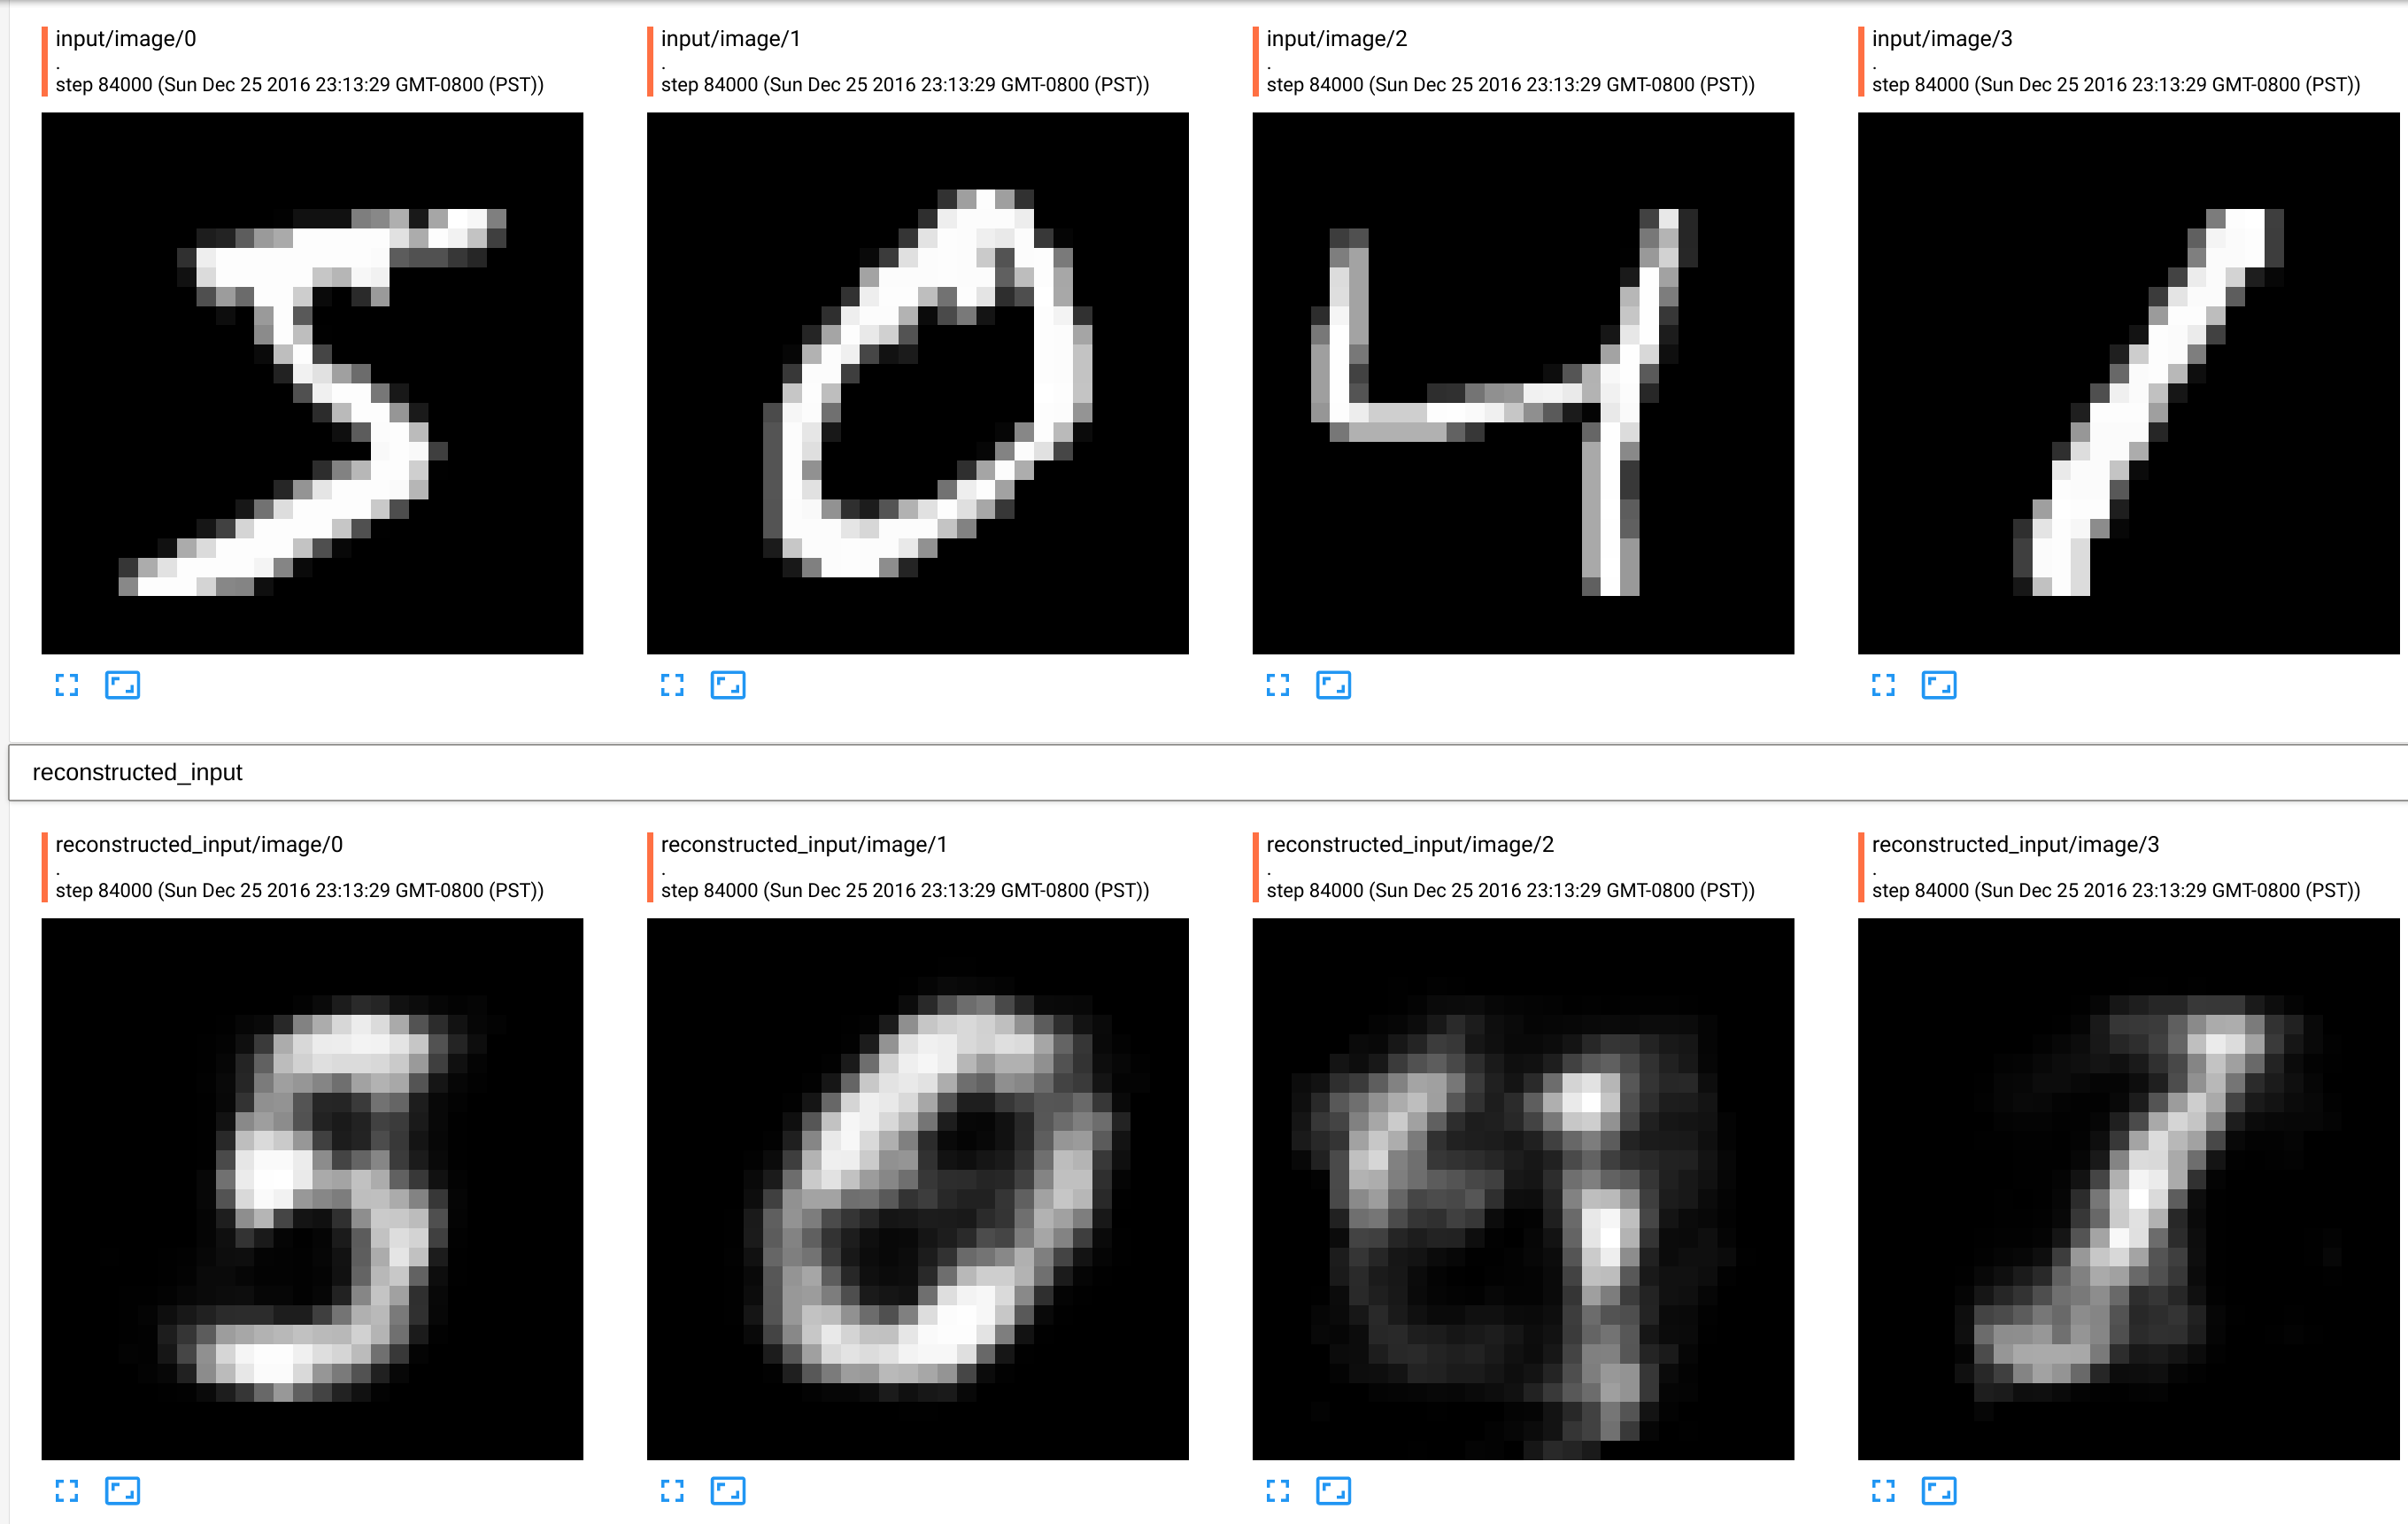
As we can see from the picture above, it only “really got” perhaps 0 and 1, but not 5 or 4. So, this is pretty bad performance. How can we improve on this? An obvious thing to try is to add more layers!
Lets add one hidden layer of 128 sigmoid units between input and encoding output of 10. Note, that this will also mean that decoding part of the network will become one layer deeper by getting additional layer with 128 units. Hence, the total path from raw inputs to reconstructed outputs will be 784->128->10->128->784. We will also use AdamOptimizer and a smaller learning rate of 0.01.
python ~/repos/autoencoder/autoencoder_use_mnist.py --encoder_network=784,128,10 --batch_size=64 --num_epochs=100 --logdir=LD_784_128_10_AdamOpt  --optimizer_kind=adamoptimizer --learning_rate=0.01
tensorboard --logdir=LD_784_128_10_AdamOpt
This time the test error is 0.136408 and results look much better:
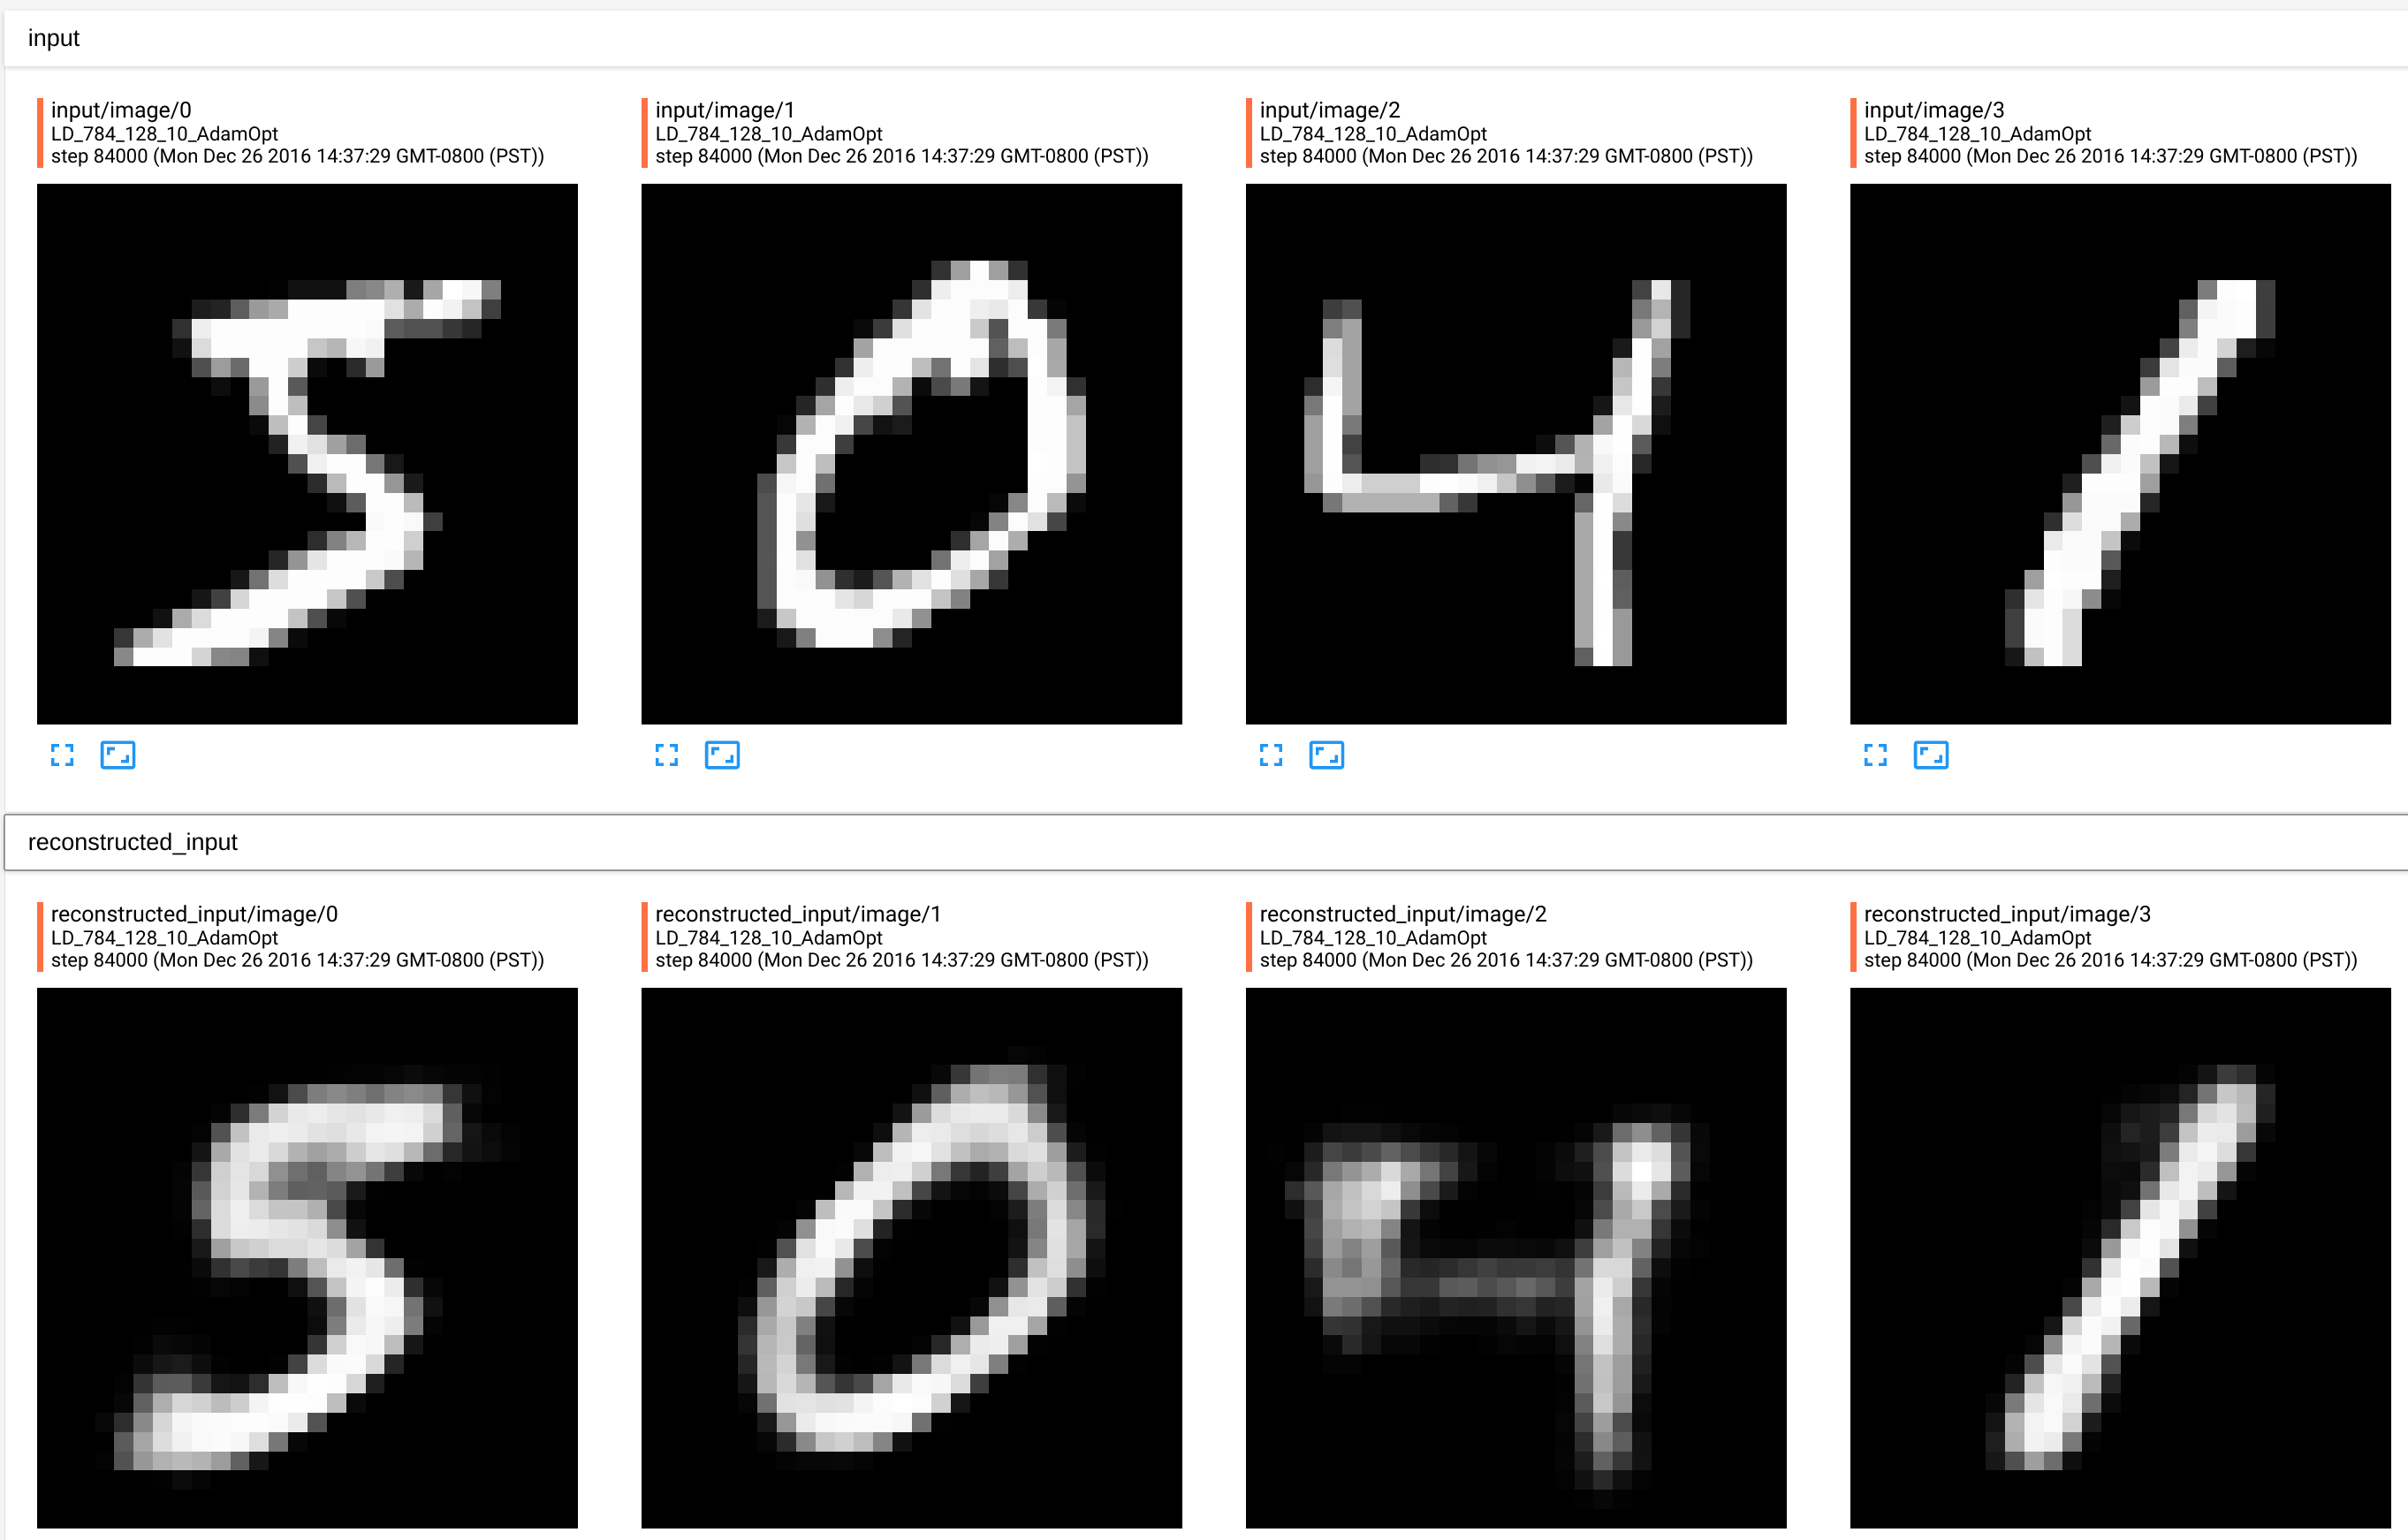
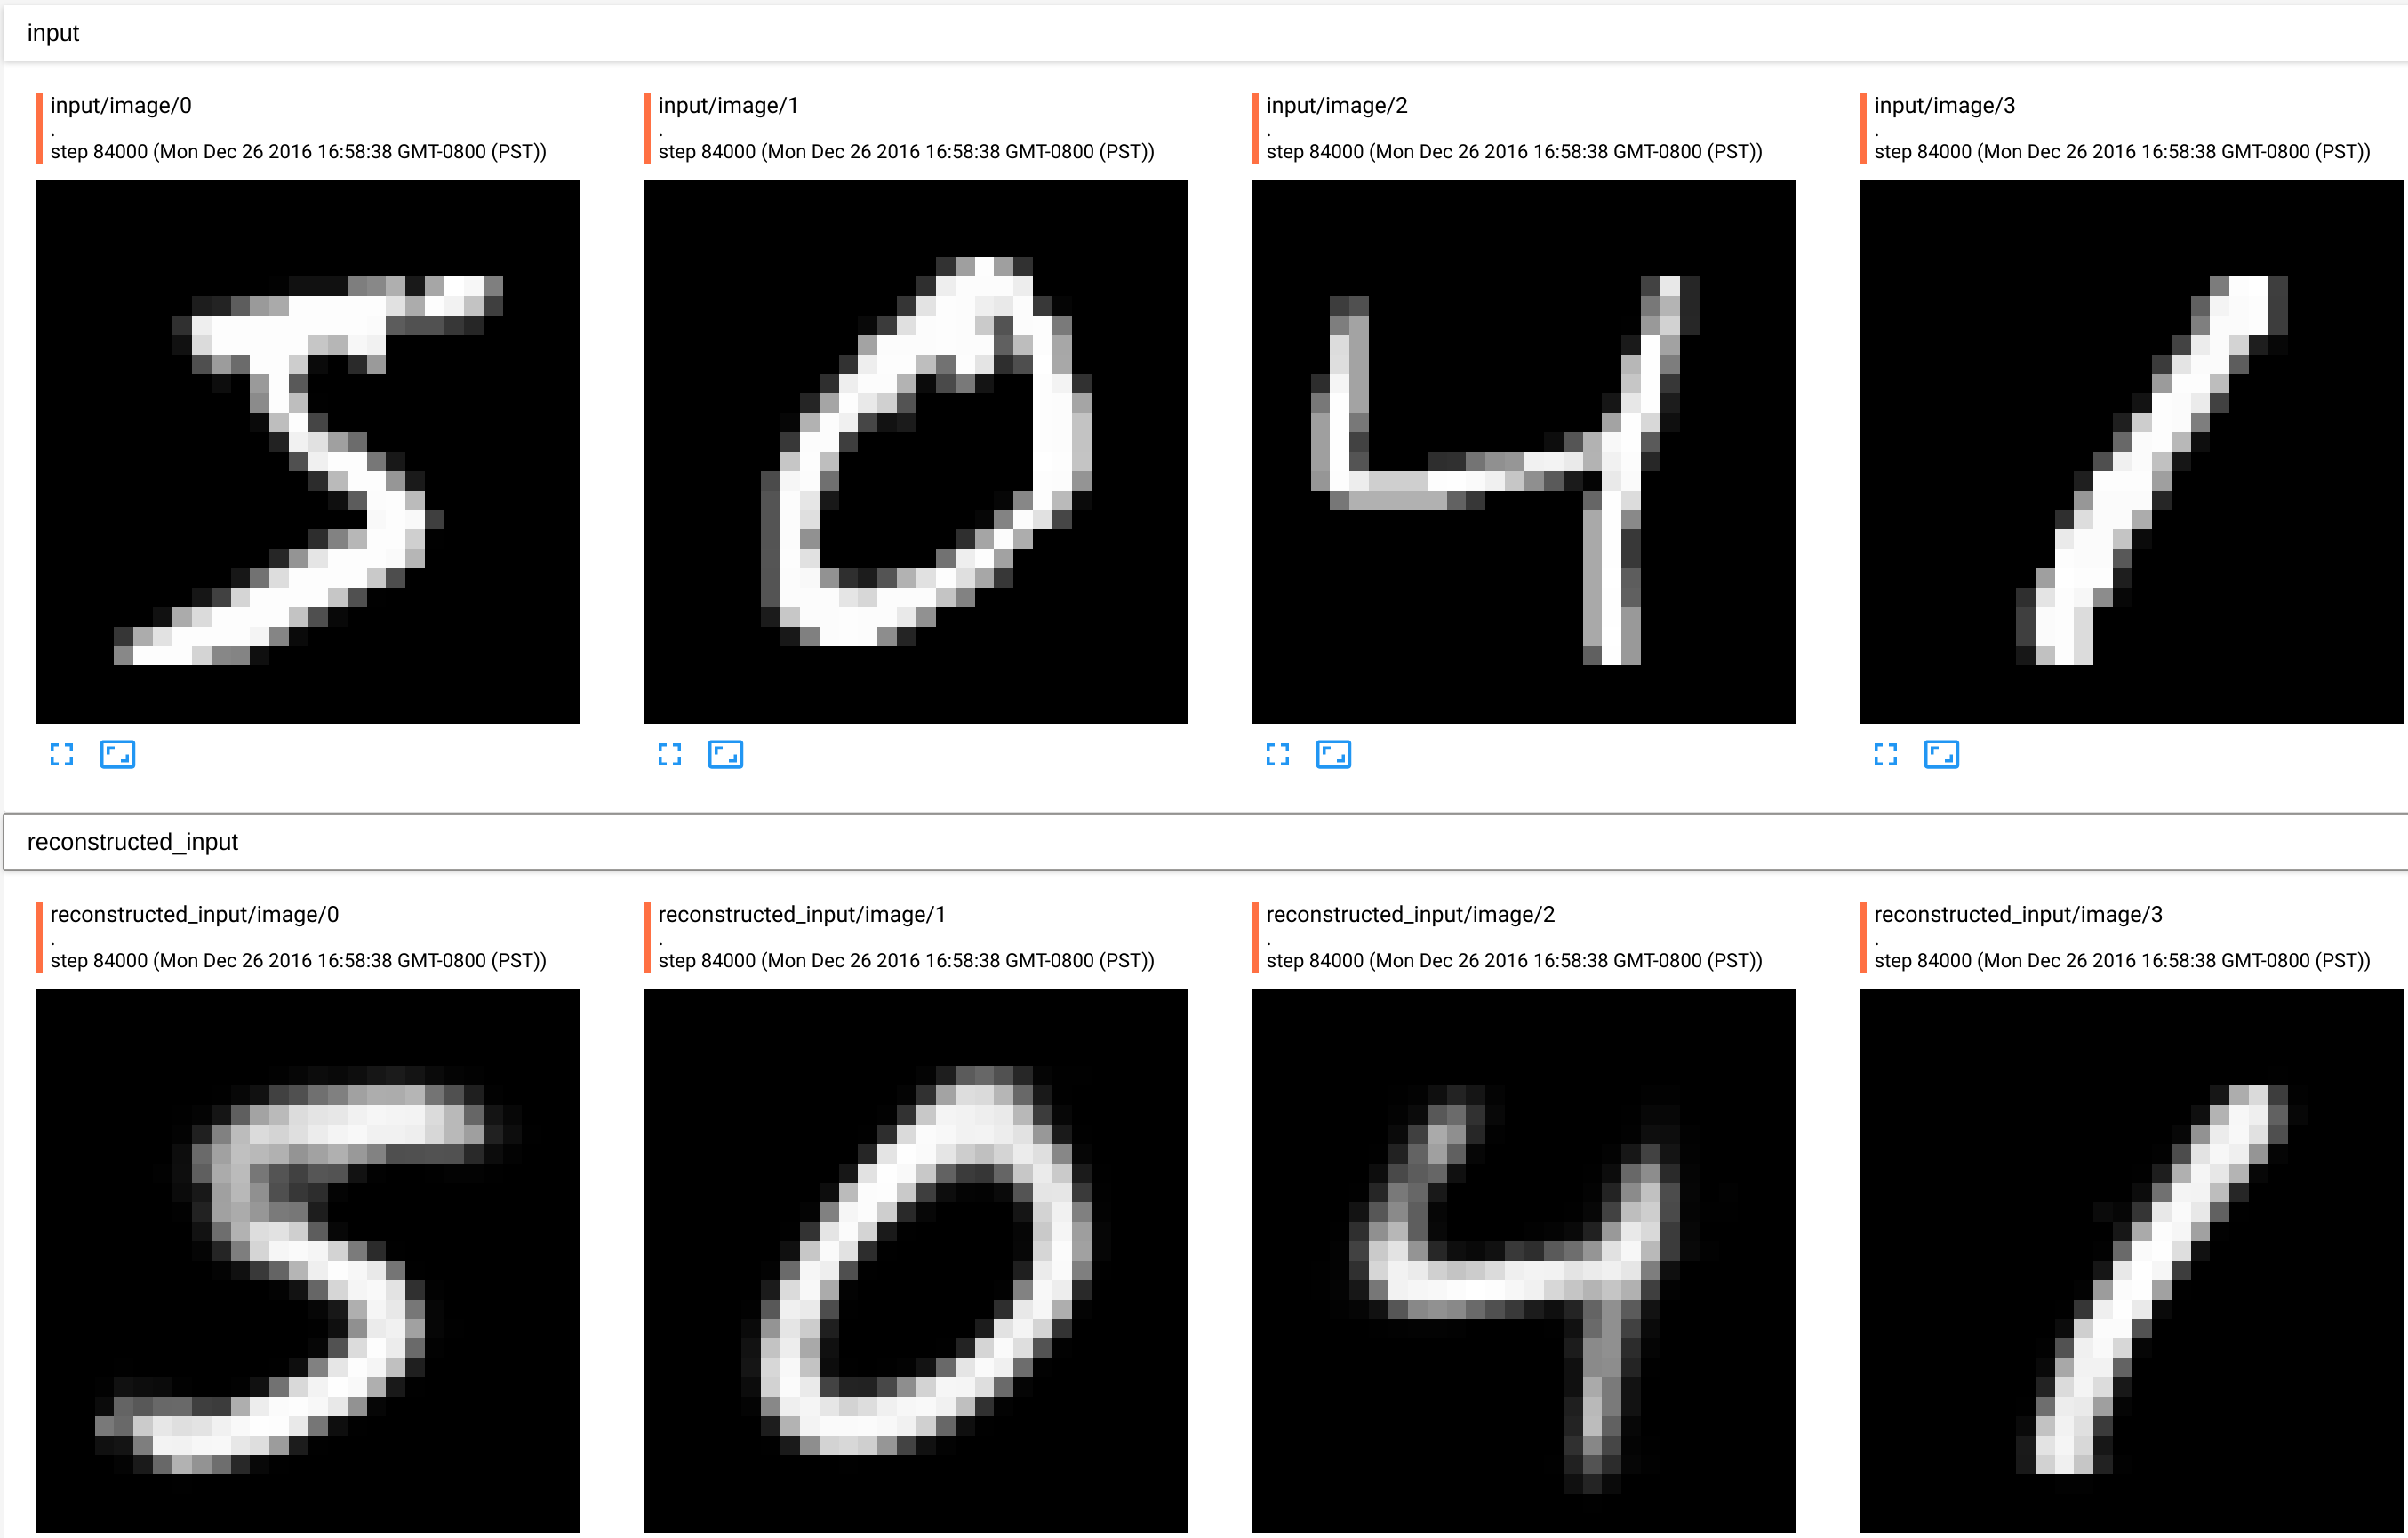
Now, reconstructed images look much closer to the original. But, how can we make this even better? Well, lets add one more hidden layer! (Note that adding a hidden layer into encoder automatically adds one more layer to the decoder). So the topology of the full network will be: “784->128->128->10->128->128->784” This time the test error is 0.131669. Making this a de-noising autoencoder by adding 30% noise to the input, improves test error to 0.130346. We can imporove this even further, by tweaking hyperparameters.
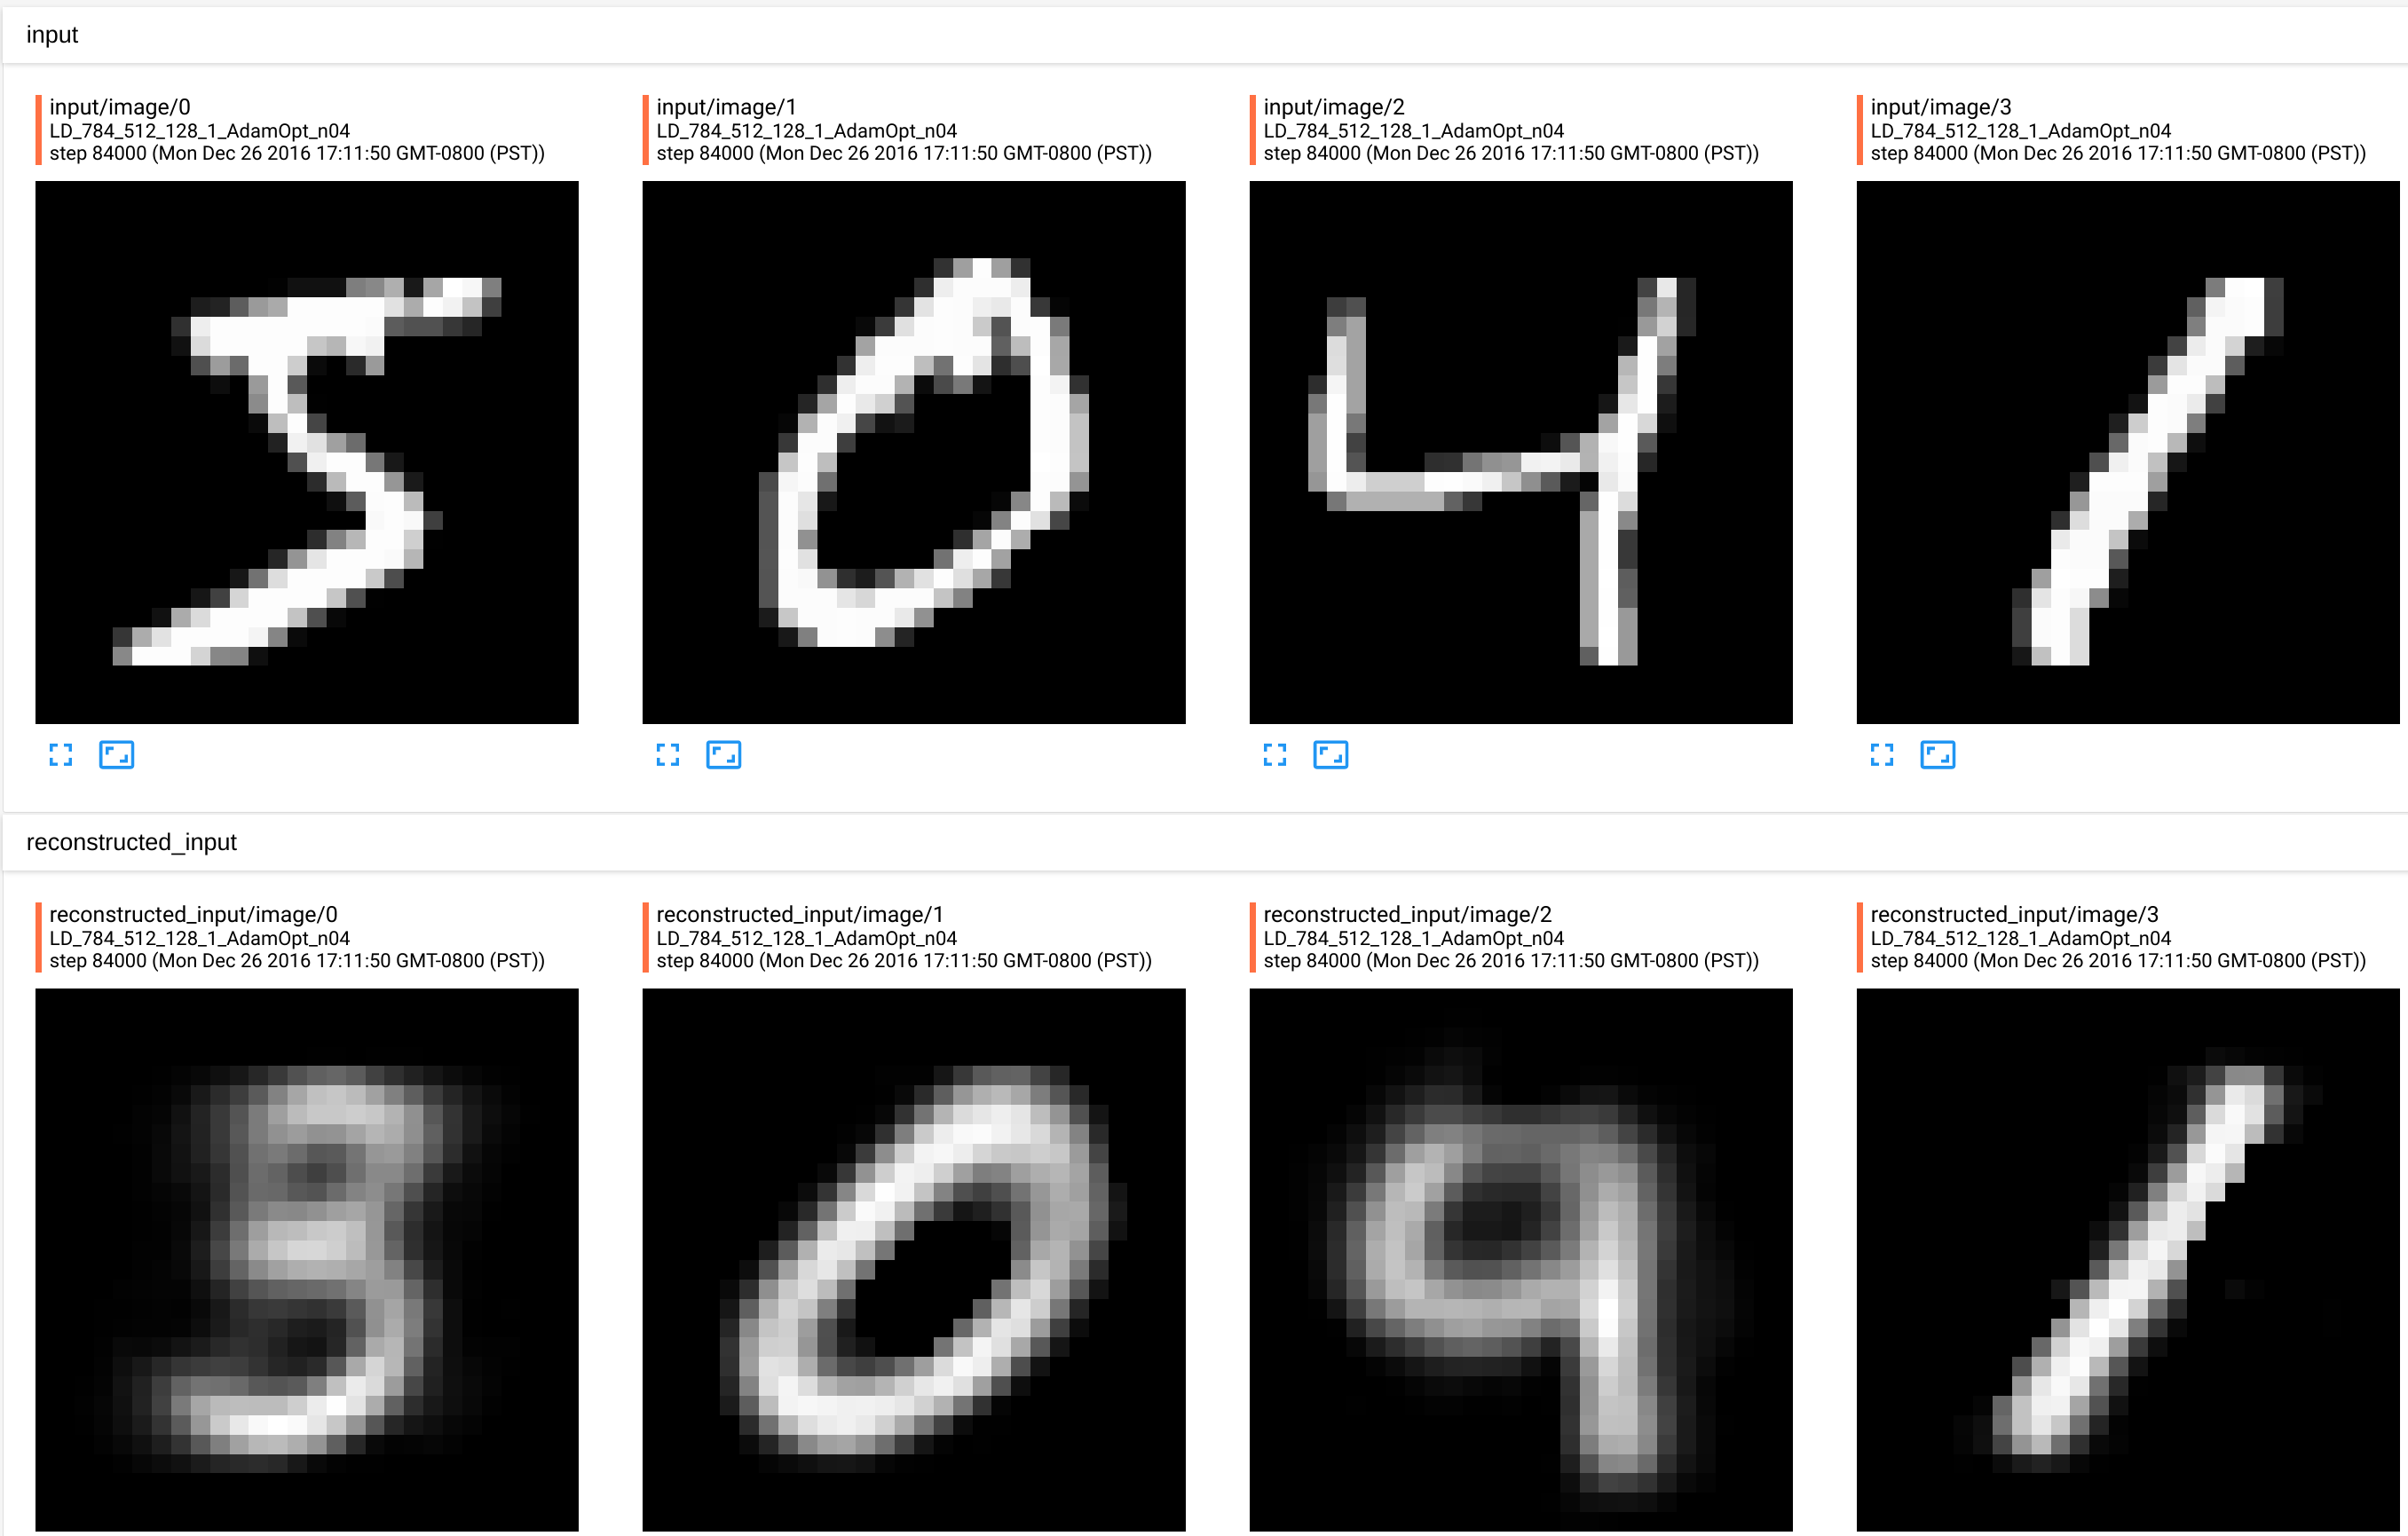
python ~/repos/autoencoder/autoencoder_use_mnist.py --encoder_network=784,512,128,10 --batch_size=64 --num_epochs=100 --logdir=LD_784_512_128_10_AdamOpt_n04  --optimizer_kind=adamoptimizer --learning_rate=0.01 --noise_level=0.4
tensorboard --logdir=LD_784_512_128_10_AdamOpt_n04
This gets us to the testing error of 0.127140 and reconstructed images look very much like input.
How many dims are enough in the encoding layer?
One can probably imporve on the above result even futher, but I will explore how many dims this autoencoder needs to encode MNIST digits?
Above, we always used 10 units in the encoding layer, with the logic being that there are 10 digits.
But lets try the same model but with only 1 units. The test error is, of course, higher in this case 0.213122 but the reconstructions look kind of reasonable still.
In particular, it still “gets” 0 and 1.
Conclusions
Deep de-nosing autoencoder is an interesting unsupervised learning model. In particular, they are well suited for data copression and representation. MNIST dataset is very small by modern standards, so it isn’t suprizing to be able to compress it into very few dimensions using relatively small model. One can, probably, improve on these results even further.